How to Install WordPress on Localhost
- September 27, 2024
- nschool
- 0

Introduction
Instructions on how to host WordPress on Localhost. WordPress described as the open source content management system that enables the user customise the appearance and functionality of the website through themes, plugins, and others can be used locally to try out various changes without a direct impact on a live site. This guide will take you step-by-step, explaining how to create a local server environment and Run WordPress, as well as accessing your site.
How to Install WordPress on Localhost?
Step 1: Setting up a Local Server Environment
A local server environment same as a web server but on your own personal computer. It lets you operate PHP and MySQL, which are important to WordPress.
Selecting Environment for the Server
Actually, there are several possibilities to establish a local server. Here are a few popular ones:
XAMPP: An online cross-platform Apache based web server solution stack package with the Apache HTTP server, the MariaDB database, and PHP and Perl scripting languages.
MAMP: A free local server environment which can be easily installed on macOS and Windows with the help of some clicks. But in fact MAMP contains all necessary to launch WordPress on your desktop.
WAMP: A Windows web development environment for developing web applications with help of Apache2, PHP and MySQL database.
Local by Flywheel: A highly effective and easy to use tool for local development designed for WordPress.
Installing XAMPP
Here’s a step-by-step guide for installing XAMPP, which is a popular choice:
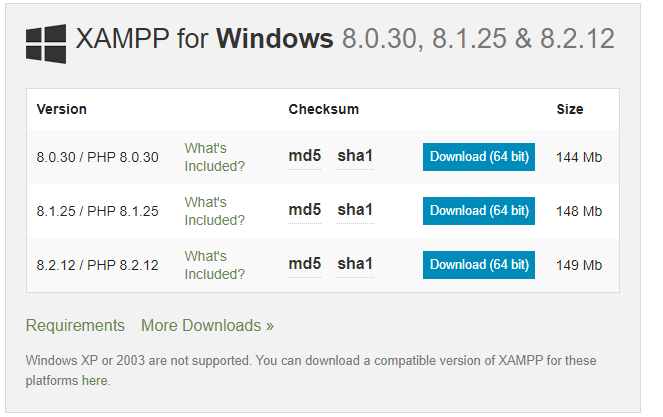
- Download XAMPP: Visit the XAMPP website
- Select the edition according to the operating system you are using Windows, macOS or Linux and then download it.
- Run the Installer: Click on the downloaded file, which would show program installation instructions.
- When asked what components to install ensure that you select the Apache and MySQL checkboxes. The rest you can safely leave blank in case you are not going to be using them.
- Complete Installation: After the installation of XAMPP is complete, you are free to open up the XAMPP Control Panel.
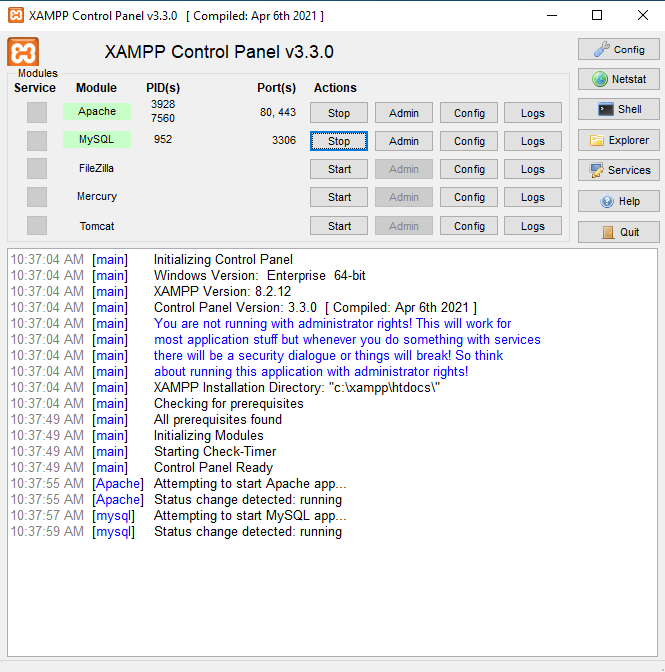
- Start XAMPP: Besides the modules in the XAMPP Control Panel below the panel, you will find buttons to start Apache and MySQL. It’s now time to stop the two services, so click the Start button beside both of them. The status should light up green, inferring that they are running.


Step 2: Download WordPress
To download the WordPress files that will be used to set up your local site:
Get WordPress:
Visit WordPress official site. To download use the latest WordPress click the ‘Download WordPress’ button.
Extract the Files:
After the download is done, find out where the zip file was downloaded and unzip it onto a folder in your computer. This will create a folder named WordPress as seen in the path above from the screenshot.
Step 3: Hosting WordPress site locally
After that you need to move WordPress files into the appropriate folder which will be read by your local server.
Locate the Local Server Directory:
For XAMPP, navigate to the htdocs directory, which is usually found in C:Many people place it in a different folder such as C:\xampp\htdocs on Windows or /Applications/XAMPP/htdocs on Mac OS.
Copy WordPress Folder:
Just FTP the entire WordPress folder and dump it in the folder htdocs.
If you prefer, you can change the folder’s name to something like my blog before proceeding.
Step 4: Open Access: Setting up a Database for WordPress
WordPress relies on a database which will hold all posts, pages, options and other information that is used by the application.
Open phpMyAdmin:
In your web browser, type http: This address http://localhost/phpmyadmin leads to phpMyAdmin, which is a web control panel for MySQL.
Create a Database:
To link to BC’s electronic databases select the ‘Databases’ tab on the top navigation bar.
In the “Create database’ field, type the name you want to give to your database (wordpress_db for instance).
If collation is not chosen by default, set it to utf8_general_ci and click on “Create”.
Note the Database Name:
Make note of your database name because you will need it in the WordPress settings.
Step 5: Configure WordPress
Now you can proceed with the installation process of WordPress.
Start the Installation: In your browser, go to http:>//localhost/WordPress (or http://localhost/myblog if you changed the name of the folder). This will open up the WordPress setup wizard.
Select Language: From the option below, select the preferred language, and then click on continue.
Database Configuration: You will be prompted to enter your database details:
Database Name: Type the name you came up with earlier followed by _db. (for instance: wordpress_db).
- Username: Username remains the default one which is root on the XAMPP control panel.
- Password: Leave this field blank, default for XAMPP in this part is left blank.
- Database Host: Leave as localhost.
- Table Prefix: This you can leave it as wp_ or you can change it for security reasons.
Run the Installation:
Press “Submit,” and WordPress will verify the connection to the database. If successful you get the message click on “Run the installation.”
Site Information: Fill out the site information
- Site Title: Enter the name for your site, for example, My Local WordPress Site.
- Username: The teacher will set up an admin username more than once, with the suggested username written being ‘admin’.
- Password: Always select and set a very good password for your admin account.
- Your Email: Enter the email address to receive the notifications.
- Search Engine Visibility: You may unselect this since it is a local setting.
- Complete Installation: Click “Install WordPress.” You should get a success message in a few moments.
Step 6: Guests can get to your local WordPress site.
Log In to WordPress: Go to http: Type www.myblog.com (or the server address: //localhost/myblog) in your browser and add /wp-admin at the end to sign in to your WordPress with the credentials you set.
Explore the Dashboard: After the login process, it’s possible to start the modification of your site, as well as installation of themes and plugins, and creation of content.
Troubleshooting Tips: If you encounter issues during the installation process, consider the following:
Services Not Starting: If Apache or MySQL doesn’t start in XAMPP, then look for other applications such as Skype that are likely to be using port 80 or port 443. You may need to halt those applications or modify the ports that have been used in XAMPP.
Error Messages: Please be aware of messages that are given out when the program is being installed as they give a direction of the actual problem (for instance wrong database credentials).
Clearing Browser Cache: If changes are not seen as made, clear out cache on browser or use settings for incognito browsing.
Firewall Settings: However, make sure that your firewall permits Apache and MySQL to connect.
Conclusion
Congratulations my friend you have now successfully installed WordPress onto your local machine. This local environment makes it possible to experiment with new functionality, create personal subjects, and try plugins with no interference with a site. If you are a learner practicing WordPress development or if you are practicing to create a new website, this setup is very helpful.

